

Today was one of those days. It was rainy and gloomy and I felt it all day. On most mornings during the week, Noah and I walk to the bus stop that's around the corner from our house. When it's sunny out, the sidewalk on our side of the street is in the sun and the sidewalk on the other side of the street is in the shade. We walk on the sunny side - I always tell Noah that I prefer the sunny side of life. This morning, Noah wanted to know where the sunny side of life was. It was nowhere to be found.


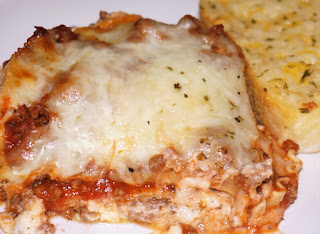

Do you prefer lasagna with ricotta or cottage cheese? Clearly, I'm in the ricotta camp.
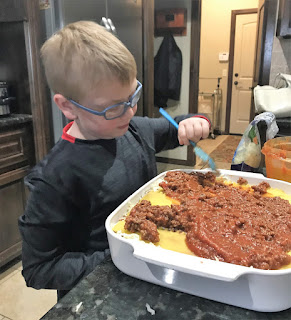
Since it was still rainy and drizzly this afternoon, I drove to the bus stop to wait for Noah's bus so that he wouldn't have to walk in the rain. (I did the same for Emily, but she gets home about an hour earlier than Noah.) When we pulled into the garage, Noah asked me if there was anything he could help me with. Even though it was a gloomy day, he still wanted to help. So, Noah helped me make a lasagna after school this afternoon.
This lasagna recipe is super easy to put together. It uses no-bake lasagna noodles, jarred spaghetti sauce, and ricotta.

I thought Noah did a great job helping. We made quite a bit of a mess but it was worth it to spend some time with Noah and learn some valuable life lessons.

Want to know my secret to using jarred spaghetti sauce and getting a homemade taste? Have you ever heard of McCormick Perfect Pinch seasoning? It's a combination of classic Italian herbs like oregano, thyme, and basil. You can find it at any grocery store. I add a little to the sauce then shake a bit more over the top. I also add a little more Parmesan cheese on the top before baking.

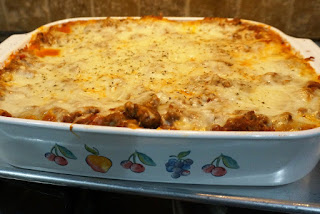
I thought Noah's lasagna turned out just wonderfully. I think he was even impressed with himself.

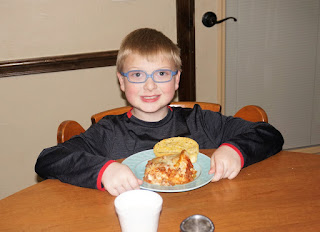
Look at how handsome and proud he is! He likes his lasagna with a slice of cheese toast.

Here's Noah's recipe. If you try it, Noah wants you to let us know how it turns out for you.
Make-Ahead Lasagna
Having guests over for dinner? You can make this recipe in advance and just pop it in the oven before your guests arrive. It's delicious and hearty and a sure crowd-pleaser. Serve with breadsticks and a side salad.
prep time: 30 MINScook time: 1 hour and 15 MINStotal time: 1 hours and 45 mins
ingredients:
- 2 lbs ground beef
- 2 jars spaghetti sauce
- 2 eggs, lightly beaten
- 20 ounces ricotta cheese
- 1/2 cup grated Parmesan cheese
- 1/2 tsp pepper
- 12-15 no-cook lasagna noodles
- 6 cups mozzarella cheese
instructions
- In a large skillet, cook beef over medium heat until browned; drain. Stir in spaghetti sauce. In a large bowl, combine eggs, ricotta, Parmesan, and pepper.
- Spread 1 cup meat sauce into a greased 13X9 inch baking dish. Layer with 4-5 noodles, half the ricotta mixture, 1 cup meat sauce, and 1 cup mozzarella. Repeat layers. Top with remaining noodles, meat sauce, and mozzarella. Cover and refrigerate for 8 hours or overnight.
- Remove from refrigerator 30 minutes before baking. Cover with foil and bake at 375 degrees for 1 hour. Uncover and bake 10-15 minutes until cheese is melted and bubbly. Let stand for 10 minutes before cutting.
notes
Lasagna can be baked immediately.
Do you prefer lasagna with ricotta or cottage cheese? Clearly, I'm in the ricotta camp.


 .
. 


